
A great logo can look perfect on a screen but completely different when stitched onto fabric. Small details may disappear, letters can become unclear, and uneven stitches can make the finished embroidery look messy.
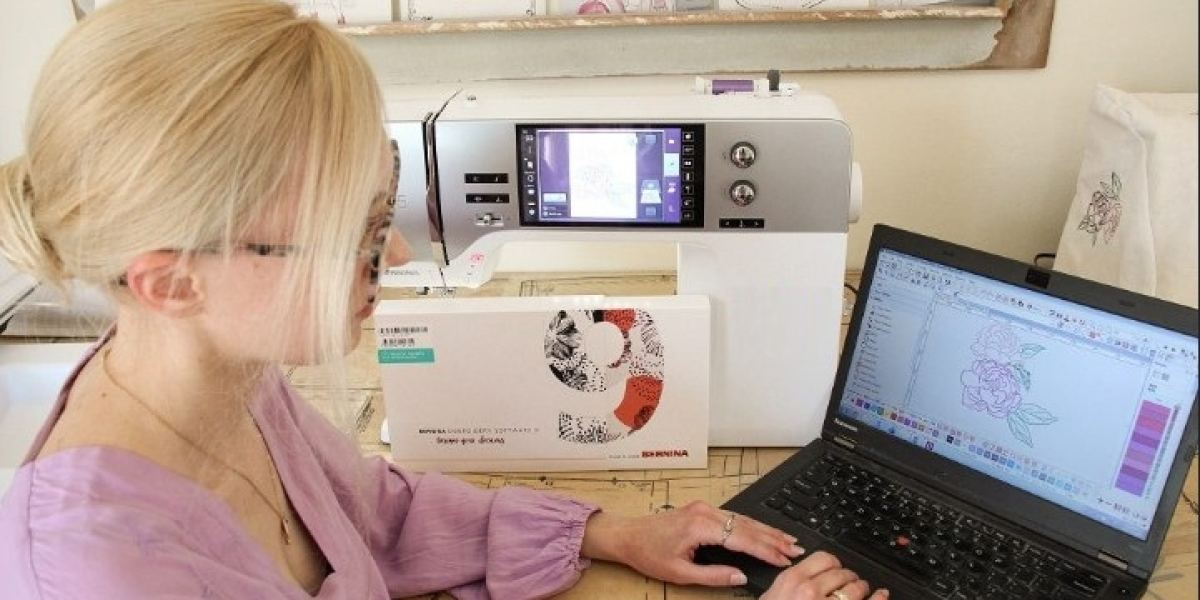
That is where Expert Custom Embroidery Digitizing Services make a real difference. Professional digitizing transforms artwork, logos, text, and illustrations into embroidery-ready files that tell an embroidery machine exactly how to stitch the design.
Good digitizing is more than simply converting an image into a machine file. It requires decisions about stitch types, density, underlay, thread direction, sequencing, and fabric. When these details are handled correctly, the final embroidery looks cleaner, sharper, and more professional.
What Are Custom Embroidery Digitizing Services?
Custom embroidery digitizing is the process of turning artwork into a digital stitch file that an embroidery machine can understand.
Unlike a regular image file, an embroidery file contains instructions for the machine. These instructions can control:
- Stitch placement
- Stitch direction
- Stitch density
- Thread changes
- Stitch sequence
- Underlay
- Trims and jumps
- Design size and positioning
For example, imagine you have a company logo in a PNG file. The image shows what the logo should look like, but it does not tell an embroidery machine how to create it with thread.
A professional digitizer studies the artwork and builds a stitch plan around it.
Why Expert Digitizing Matters
Not every embroidery design needs the same treatment. A simple text logo may require a completely different approach from a detailed illustration.
Experienced digitizers consider the final material, design size, stitch count, and level of detail before creating the file.
Better Stitch Quality
Proper stitch planning helps prevent gaps, excessive thread buildup, and rough edges. The goal is to make every part of the design work together.
Cleaner Small Details
Tiny letters, thin outlines, and narrow shapes are challenging in embroidery. Expert digitizing can adjust these elements so they remain readable after stitching.
Improved Fabric Coverage
Poor density settings can cause fabric to show through the design or create an unnecessarily heavy area. Professional embroidery digitizing aims for balanced coverage.
Fewer Production Problems
A well-prepared embroidery file can reduce issues such as excessive thread breaks, unnecessary trims, jump stitches, and distorted shapes.
How Professional Embroidery Digitizing Works
Creating a quality embroidery file usually involves several important steps.
1. Artwork Evaluation
The original artwork is reviewed first. The digitizer looks at its size, shapes, colors, outlines, and details.
The artwork may need cleaning or adjustment before digitizing begins.
2. Design Planning
Next, the digitizer decides how the artwork should be constructed using stitches.
Different areas may require different stitch techniques depending on their shape and purpose.
3. Choosing Stitch Types
Common embroidery stitch types include:
- Satin stitch: Often used for borders, lettering, and narrow shapes.
- Fill stitch: Useful for larger areas that need solid coverage.
- Running stitch: Suitable for fine lines and delicate details.
- Underlay stitches: Help stabilize the fabric and support the top stitches.
Choosing the right stitch type can have a major impact on the final appearance.
4. Setting Stitch Density
Stitch density determines how closely stitches are placed together.
Too much density can make an area stiff and heavy. Too little can leave unwanted gaps and expose the fabric.
Professional digitizers select density based on the design, fabric, thread, and size.
5. Applying Underlay
Underlay is placed beneath the main stitches to help stabilize the design.
It can improve coverage, reduce fabric movement, and provide a better foundation for the visible stitches.
6. Setting Stitch Direction
Thread direction affects the way light reflects from embroidered surfaces.
Changing stitch angles can also help different sections of a design stand apart visually.
7. Setting the Stitch Sequence
The order in which sections are stitched matters. A thoughtful sequence can reduce unnecessary trims and help control distortion.
8. Testing and Adjustments
Before production, the design should ideally be reviewed and tested.
A test stitch-out can reveal problems that may not be obvious on a computer screen. Adjustments can then be made before the final production run.
What Designs Can Be Digitized?
Expert Custom Embroidery Digitizing Services can be used for many types of artwork and products.
Common examples include:
- Business logos
- Team logos
- Monograms
- Names and lettering
- Uniform designs
- Cap and hat artwork
- Jacket-back designs
- Embroidered patches
- Promotional artwork
- Detailed illustrations
- Personalized gifts
The best digitizing approach depends on the design and the item where it will be embroidered.
Digitizing for Different Fabrics
Fabric selection can change the way an embroidery design needs to be prepared.
A design stitched on a stable jacket may behave differently on a stretchy shirt. Likewise, hats have different requirements because of their curved surface and limited stitching area.
Professional digitizing may account for:
- Cotton
- Denim
- Fleece
- Twill
- Polyester garments
- Stretch fabrics
- Caps and hats
- Jackets
- Towels
This is why simply using the same file on every material may not produce consistent results.
Custom Embroidery Digitizing for Small Text
Small lettering is one of the most challenging areas of machine embroidery.
If letters are too small or contain excessive detail, they can become difficult to read after stitching.
A skilled digitizer may simplify letter shapes, adjust stitch direction, modify density, or choose a more suitable stitch structure.
The goal is not to reproduce every tiny pixel from the original artwork. The goal is to create embroidery that looks clear and attractive.
Benefits of Expert Custom Embroidery Digitizing Services
Choosing professional digitizing can provide several practical benefits.
1. Professional-Looking Results
Proper stitch planning helps create smooth edges, balanced fills, and readable details.
2. Better Design Accuracy
Professional digitizing preserves the important visual features of your artwork while adapting them for thread.
3. Reduced Stitch Problems
Well-planned files can help minimize unnecessary jumps, trims, thread breaks, and excessive stitching.
4. Suitable Machine Files
Depending on your embroidery machine, you may need a particular file format. Professional services can prepare the design in the required format.
5. Production Efficiency
A clean embroidery file can make production easier, especially when the same design will be stitched repeatedly.
How to Choose a Reliable Digitizing Service
There are many digitizing providers available, so it is important to compare quality rather than choosing only by price.
Look for these qualities:
- Relevant experience: Check whether they regularly work with designs similar to yours.
- Clear communication: They should understand your size, fabric, placement, and machine requirements.
- Quality samples: Review actual embroidery examples rather than relying only on digital previews.
- Revision options: Ask whether reasonable changes can be made when the result needs adjustment.
- Machine compatibility: Confirm that the supplied format works with your embroidery machine.
- Attention to detail: Professional digitizing should focus on the final stitched result, not simply file conversion.
Common Mistakes to Avoid
Even a good artwork file can produce poor embroidery if the digitizing process is rushed.
Using One File for Every Size
A design that works well at 4 inches may not work equally well at 1.5 inches.
Different sizes can require different stitch settings and adjustments.
Ignoring the Fabric
The same stitch plan may not perform equally well on denim, knitwear, fleece, or caps.
Making Small Designs Too Detailed
Embroidery has physical limitations. Extremely fine details may need to be simplified.
Focusing Only on Stitch Count
A lower stitch count does not automatically mean a better design. Quality, coverage, appearance, and production performance all matter.
Skipping a Test Stitch-Out
A computer preview cannot always show how thread will behave on real fabric. Testing can catch issues before bulk production.
Tips for Getting Better Digitizing Results
You can make the digitizing process easier by providing useful information with your artwork.
Share:
- The original artwork in the highest quality available
- Desired embroidery dimensions
- Garment or fabric type
- Intended placement
- Preferred thread colors
- Required embroidery file format
- Any important design details
If you are ordering a large production run, requesting a sample stitch-out before full production can also be a smart step.
Custom Digitizing vs. Automatic Conversion
Automatic image-to-embroidery conversion may seem convenient, especially for simple artwork. However, software cannot always understand the practical requirements of embroidery as well as an experienced digitizer.
Automatic conversion may produce problems such as:
- Excessive stitch counts
- Poor stitch sequencing
- Unwanted tiny details
- Uneven density
- Too many trims
- Weak small lettering
For simple designs, automated tools may sometimes be useful. For logos, detailed artwork, commercial work, or challenging fabrics, custom digitizing usually provides greater control.
Why Quality Matters for Business Embroidery
For businesses, embroidery is often part of the brand image.
A company logo with uneven borders or unreadable lettering can make uniforms, hats, bags, and promotional products look less professional.
Expert Custom Embroidery Digitizing Services help translate the original brand artwork into a stitch structure that is suitable for real-world embroidery.
This is especially important when a logo will be produced across multiple garments and product types.
Final Thoughts
Professional embroidery starts long before the needle touches the fabric. The quality of the digitized file has a direct effect on how clean, durable, and attractive the finished design can be.
Expert Custom Embroidery Digitizing Services combine artwork preparation, stitch planning, density control, underlay, sequencing, and testing to create embroidery-ready designs.
Whether you need a business logo, small lettering, a cap design, patch artwork, or a detailed illustration, choosing a skilled digitizing approach can help turn your artwork into embroidery that looks intentional and professional.
FAQs
What are Expert Custom Embroidery Digitizing Services?
They are professional services that convert artwork, logos, text, or illustrations into embroidery machine files with carefully planned stitches, density, sequencing, and underlay.
Why is custom digitizing better than simple image conversion?
Custom digitizing considers embroidery-specific factors such as fabric, design size, stitch direction, density, and stitch types. Basic image conversion may not handle these factors correctly.
Can small logos and lettering be digitized?
Yes. Small designs can be digitized, but they often require simplified details and carefully selected stitch settings to remain readable.
Does fabric affect embroidery digitizing?
Yes. Different fabrics behave differently during stitching. Stretchy, thick, soft, and curved materials may require different digitizing techniques.
Should I test an embroidery file before bulk production?
Yes. A test stitch-out can help identify problems with density, sizing, thread direction, lettering, and fabric interaction before producing a large quantity.