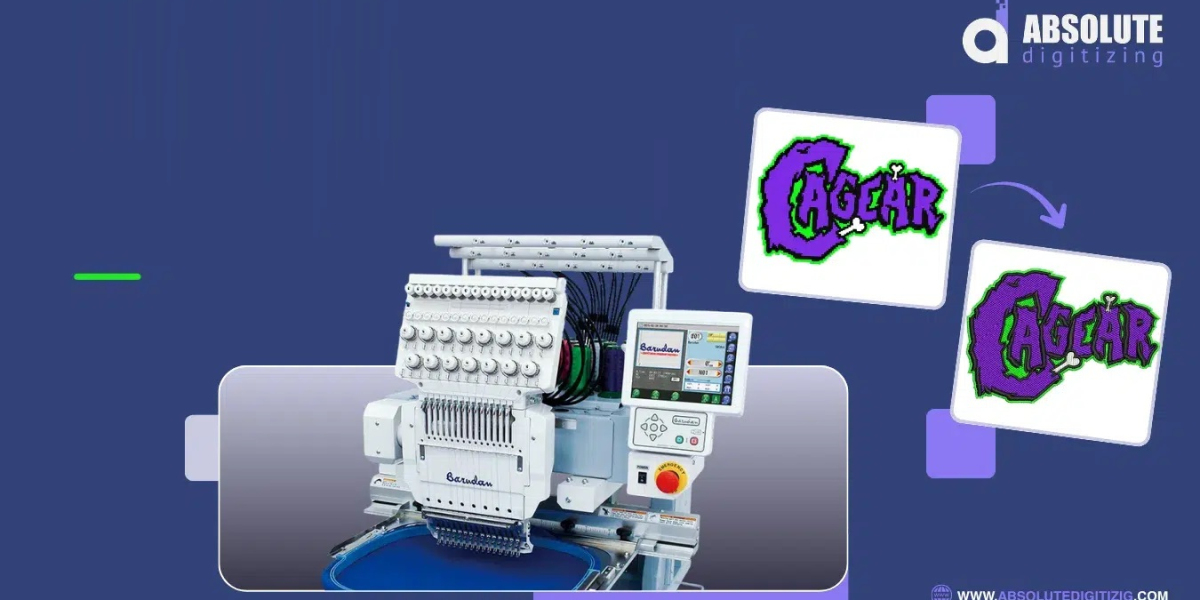

A logo may look perfect on a computer screen, but embroidery is a different story. A digital logo uses pixels, lines, and colors, while an embroidery machine needs detailed stitch instructions. That is why you cannot simply upload a JPG or PNG and expect a Barudan machine to sew it correctly.
If you want to turn logo into Barudan embroidery file, the artwork must first be converted into a properly digitized embroidery design. This process determines stitch types, stitch direction, density, underlay, thread colors, and other details needed for smooth stitching.
Whether you are preparing a company logo, sports emblem, uniform design, or promotional artwork, good digitizing can make the difference between a professional result and a messy one.
What Is a Barudan Embroidery File?
A Barudan embroidery file is a machine-readable design that contains instructions for an embroidery machine. Instead of simply showing what the logo looks like, the file tells the machine how to recreate it with thread.
The design can contain information such as:
- Stitch placement
- Stitch direction
- Stitch length
- Thread color changes
- Jump stitches
- Trims
- Needle selections
- Stitch sequence
Barudan machines commonly work with embroidery machine formats such as DST, depending on the machine and workflow. Before saving the final design, always check the exact format required by your Barudan machine.
Why You Need to Digitize a Logo
A JPG, PNG, PDF, or other artwork file is not automatically an embroidery design.
For example, imagine a logo with a red circle, black text, and a small icon. On your screen, these elements are simply shapes. An embroidery machine needs each shape broken into stitchable sections.
Professional digitizing converts those visual elements into embroidery objects.
The digitizer decides:
- Which stitch type should be used.
- Where each stitch should start and stop.
- Which direction the stitches should follow.
- How much density each area needs.
- Where underlay should be added.
- How different sections should overlap.
- How the design should be sequenced.
This is why simply converting an image file extension is not the same as creating a quality embroidery file.
How to Turn Logo into Barudan Embroidery File
The conversion process becomes much easier when you understand each stage.
1. Start With Good Logo Artwork
The quality of the original artwork affects the digitizing process.
A clean vector logo or high-resolution image is usually easier to work with than a blurry or heavily compressed picture.
Before digitizing, check:
- Logo dimensions
- Text clarity
- Number of colors
- Fine details
- Small lettering
- Shapes and outlines
- Background elements
Remove unnecessary details when possible. Very tiny elements may not reproduce well in thread.
2. Set the Correct Design Size
Size matters in embroidery.
A logo that looks great at 8 inches wide may not work well when reduced to 2 inches. Small text can become difficult to read, while narrow shapes may disappear during stitching.
Before you turn logo into Barudan embroidery file, determine where the design will be embroidered.
For example:
- Caps require different planning than jackets.
- Left-chest logos need different sizing than large back designs.
- Small patches require careful stitch planning.
- Thick fabrics may need stronger underlay.
Always digitize with the final embroidery size in mind.
3. Separate the Logo Into Objects
A professional digitizer breaks the artwork into individual embroidery objects.
A simple logo might contain:
- Background shape
- Main lettering
- Border
- Small symbol
- Decorative details
Each object can then receive the most suitable stitch type.
This object-based approach also makes it easier to control stitch direction, density, and sequencing.
4. Choose Suitable Stitch Types
Different parts of a logo require different stitches.
Satin stitches are useful for borders, columns, outlines, and lettering.
Fill stitches work well for larger areas and solid shapes.
Running stitches are useful for thin lines and fine details.
Using one stitch type for everything can produce poor results. The goal is to match the stitch structure to the shape and size of each element.
5. Add Proper Underlay
Underlay stitches are placed underneath the visible stitches.
They help stabilize fabric and create a better foundation for the design.
Good underlay can:
- Improve fabric coverage
- Reduce shifting
- Support top stitches
- Improve lettering
- Help maintain sharp edges
However, adding too much underlay can increase bulk and create unnecessary stiffness. It should be selected according to the fabric, design, and stitch structure.
6. Adjust Stitch Density
Stitch density controls how closely stitches are placed together.
If density is too low, the fabric may show through. If it is too high, the design can become heavy, stiff, or cause thread and needle problems.
The correct setting depends on factors such as:
- Fabric type
- Thread
- Stitch type
- Design size
- Layering
- Underlay
A professional digitizer does not use one density setting for every logo.
7. Plan Stitch Direction and Sequence
Stitch direction affects the appearance of embroidered areas.
Changing stitch angles can add structure and help the design look more natural. Stitch sequence is also important because it can reduce unnecessary trims and jumps.
A good sequence generally considers:
- Which object should stitch first
- Where the needle should enter and exit
- How sections overlap
- When thread colors should change
- How to reduce unnecessary movement
This makes the design more efficient for the machine and can improve the final appearance.
8. Export the Barudan-Compatible File
Once digitizing is complete, the design can be saved in the format required by the machine.
For many commercial embroidery workflows, DST is a common choice. However, the correct format depends on the specific Barudan machine, controller, and software workflow.
Do not assume that every Barudan setup uses exactly the same file requirements. Check your machine documentation before exporting.
9. Test the Design Before Production
Never rely only on the computer preview.
A test sew-out can reveal problems that are difficult to notice on screen.
Look for:
- Thread breaks
- Poor registration
- Uneven coverage
- Excessive density
- Weak small lettering
- Fabric puckering
- Unnecessary trims
- Incorrect color sequence
- Poor edges
Testing is especially important before producing a large batch.
Common Problems When Converting Logos
When people try to turn logo into Barudan embroidery file without proper digitizing, several problems can appear.
Tiny Text Becomes Unreadable
Small lettering needs careful stitch planning. If letters are too small, their shapes may close up or lose important details.
Too Many Stitches
Automatically tracing every detail can create unnecessary stitches. This increases production time and may make the design heavy.
Poor Registration
When different sections do not line up correctly, gaps or overlaps may appear.
Proper compensation and stitch planning help reduce this issue.
Fabric Puckering
Puckering can happen because of excessive density, poor stabilization, unsuitable underlay, or incorrect settings.
Too Many Jump Stitches
Poor sequencing can create unnecessary jumps and trims. A properly planned design can reduce these movements.
Automatic Conversion vs. Professional Digitizing
There is an important difference between automatic conversion and embroidery digitizing.
Automatic tools can trace artwork and create basic stitch information. This may be useful for simple designs, but complex logos usually need manual adjustments.
Professional digitizing considers how thread behaves on fabric.
For example, a thin line that looks perfect in vector artwork may need to be widened or redesigned for embroidery. Similarly, very small spaces between letters may need adjustment so they remain visible after stitching.
In other words, embroidery digitizing is more than changing a file format.
How to Prepare Your Logo for Digitizing
You can make the process easier by preparing your artwork properly.
Before sending your logo for digitizing:
- Use the cleanest version of the artwork available.
- Provide the desired finished size.
- Mention the fabric or garment type.
- Identify important brand colors.
- Tell the digitizer where the design will be used.
- Point out any details that must remain visible.
- Request a sew-out when the design is important or complex.
These details help create a more practical embroidery design.
Tips for Better Barudan Embroidery Results
If you regularly produce embroidered logos, keep these tips in mind.
Keep Small Details Simple
Embroidery has physical limitations. Tiny shapes and narrow gaps may not reproduce like they appear on a screen.
Consider the Fabric
A design intended for a structured cap may need different settings from one intended for a soft sweatshirt.
Avoid Excessive Density
More stitches do not always mean better quality. Too many stitches can increase bulk and create tension problems.
Check the Final Size
Always review the design at its actual embroidery size instead of judging it only when enlarged on a monitor.
Test Before Bulk Production
A few minutes spent on a test sew-out can save hours of production problems later.
Why Choose Absolute Digitizing?
At Absolute Digitizing, the focus is on creating embroidery-ready artwork rather than simply changing an image extension.
A logo is reviewed according to its size, details, stitch structure, and intended use. The goal is to create a practical design that can produce clean embroidery on the selected material.
For businesses handling uniforms, promotional products, caps, jackets, patches, and other embroidered items, careful digitizing can help reduce production issues and improve consistency.
Frequently Asked Questions
Can I turn a JPG into a Barudan embroidery file?
Yes. A JPG can be used as the starting artwork, but it needs to be properly digitized into embroidery stitches before it can be used by a compatible Barudan machine.
What file format does a Barudan embroidery machine use?
DST is commonly used in commercial embroidery workflows, but the required format can vary by Barudan machine and controller. Always confirm your specific machine's requirements.
Can I convert a logo automatically?
Some software can automatically convert artwork into stitches. However, automatic conversion may require manual editing, especially for lettering, small details, stitch density, and sequencing.
Why does my embroidered logo look different from the original artwork?
Thread behaves differently from pixels or vector lines. Factors such as stitch direction, density, underlay, fabric, and design size can change the final appearance.
How can I get a better Barudan embroidery result?
Use clean artwork, choose the correct design size, apply suitable stitch settings, test the design, and make adjustments based on the actual fabric and machine setup.
Conclusion
To turn logo into Barudan embroidery file, you need more than a simple file conversion. The artwork must be carefully transformed into stitches that account for fabric, thread, design size, density, underlay, stitch direction, and machine requirements.
Start with clean artwork, plan the design around its final size, use suitable stitch types, and always test before production. With proper digitizing, your logo can move from a digital screen to clean, professional embroidery.
Absolute Digitizing can help turn your artwork into a machine-ready embroidery design with attention to the details that matter during actual production.