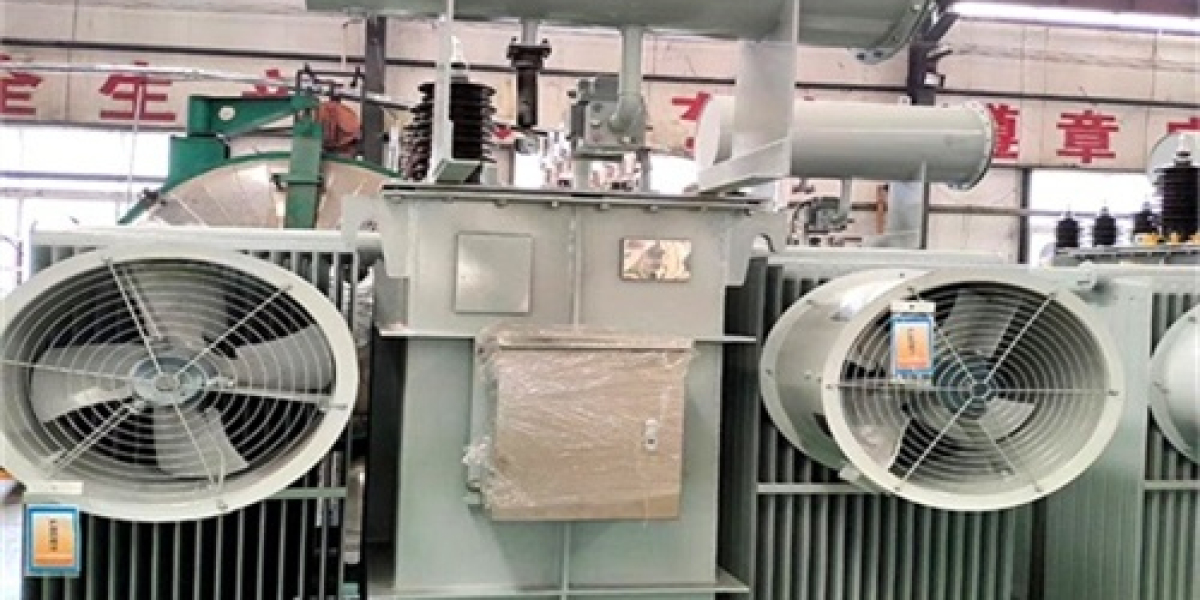

Before anyone touches an oil-immersed transformer for service, testing, or fault work, it has to be brought to a verified zero-energy state and bonded to ground. In U.S. practice that means de-energize both the high- and low-voltage sides, apply Lockout/Tagout, test for absence of voltage, then apply temporary protective grounding. The field method below uses a grounding (discharge) stick to equalize potential and bleed off residual charge. Treat it as a supplement to, never a replacement for, a verified zero-voltage test.
1. Before you begin
De-energize and isolate
- Open and disconnect the transformer on both the high-voltage and low-voltage sides.
- Apply Lockout/Tagout (LOTO) and hang a "Do Not Operate / Men at Work" tag on every disconnect.
- Put on voltage-rated insulating gloves and dielectric boots before handling anything.
Gather the tools
- Grounding cable: flexible copper, cross-section no smaller than 25 mm² (about 3 AWG).
- Grounding / discharge stick: the insulated section must meet the clearance for the system voltage — for a 12.47 kV-class unit use an insulated length of at least 0.7 m (about 28 in).
- Voltage tester (absence-of-voltage tester): rated for the transformer's voltage class and confirmed working. Test it on a known live source, then on the transformer, then back on the known source (the NFPA 70E test sequence).
Check the surroundings
- Clear flammable or explosive material away from the work area and keep ventilation good so any spark can't ignite something.
- Confirm the oil level is normal. If it's low, top up with qualified insulating oil before you start. [Confirm: use the oil type specified for the unit.] The full oil-immersed product range is on the products page.
2. Discharging the high-voltage side
- Connect the ground end. Anchor one end of the grounding cable to a verified ground — the ground grid or a dedicated ground rod — and leave the other end free to reach the HV terminals.
- Use the stick. Stand on an insulating mat, hold the stick by its insulated section, and bring the metal tip slowly toward the HV terminal (for example, the top of the bushing). When you hear the crackle or see a spark, hold contact for 5–10 seconds to bleed the residual charge. Repeat 2–3 times with a 1–2 minute gap between each until there is no more sparking.
- Bond directly (optional). Where the setup allows, clamp the grounding cable directly to the HV terminal and secure it so the unit stays grounded.
3. Discharging the low-voltage side
- Connect a second grounding cable to ground, leaving the far end free for the LV side.
- Either use the stick on the LV terminals the same way as the HV side, or clamp the grounding cable directly to the LV terminal and hold contact for at least 5 minutes.
4. Core and frame bonding
The core is normally a permanent single-point ground, so "discharging" it really means confirming that bond and letting any induced charge drain.
- Lower the oil. Crack the bottom drain valve and draw off a small amount of oil (about 5–10 L, roughly 1.3–2.6 gal) to drop the level enough to work.
- Bond the core. Connect a dedicated grounding cable from the core ground point (usually at the tank bottom or side) to the ground grid. If the core has no dedicated ground point, bond through the tank shell — but make sure the contact is solid.
- Hold the bond. Keep the core grounded for at least 30 minutes so any residual charge fully dissipates.
5. Verify, restore, and record
Verify zero voltage
- With the voltage tester, check the HV side, LV side, and core ground point. No voltage should show.
- If the tester alarms, repeat the discharge and re-test until it is clean. The same checks appear in our routine testing guide.
Restore and clean up
- Remove the grounding cables and discharge stick and store them.
- Close the drain valve and check the oil level.
- Clear the site, remove the tag, and restore the transformer to operable condition if the work is done.
Record it
- Log the discharge time, who performed it, and the result.
- If anything looked off during discharge — sustained sparking, discolored oil — stop immediately and report it.
6. Safety notes
- No live work. Confirm the unit is fully de-energized and verify absence of voltage before you start.
- No wet work. Don't discharge in rain or high humidity; moisture breaks down the dielectric rating of your tools and mat.
- Watch the arc. Stand to the side, never in front of the contact point, and bring the stick in slowly to avoid a hard arc.
- Control oil. If oil leaks during the work, clean it up and replace it with qualified oil so the dielectric doesn't degrade.
- Special cases. A faulted unit (internal short or ground fault) can throw a large arc — wear fire-resistant gear and use remote-handling tools. On units rated 10 MVA and above, consider an automatic discharging device for safety and speed.
U.S. vs. field method. The steps above are a practical equalization routine. In the U.S., the controlling rules are OSHA LOTO (29 CFR 1910.147) and NFPA 70E: de-energize, lock out, verify absence of voltage, then apply temporary protective grounding. The sparking-stick step is an informal equalization technique layered on top — it does not replace a verified zero-voltage test. The standards mapping is covered in our IEC 60076 vs ANSI/IEEE guide for export units. Always follow your utility's procedures and a qualified electrician's direction.
More field guides live in the resources library, and the broader product range is on the products page. See how these procedures are applied on real jobs in our projects archive.
7. FAQ
Why discharge more than once?
A transformer stores charge in its distributed capacitance, and that charge bleeds off slowly and can rebuild between attempts. Hitting it two or three times, a minute or two apart, makes sure you've actually drained it rather than catching a momentary lull.
Is longer always better?
No. Time scales with size and voltage class — roughly 5–10 seconds per touch on the HV side, and at least 30 minutes for the core bond. Over-discharging doesn't help and can stress the insulation, so follow the figure for your unit instead of assuming longer is safer.
Can I just short the terminals with a wire?
Never. Clipping a bare conductor across the terminals can dump a huge fault current and destroy the equipment or kill someone. Use the proper grounding stick and rated grounding cable, applied through the controlled sequence above.
If the breaker is open, isn't it already safe?
Not necessarily. Even with the source open, capacitance and induced voltage can leave a terminal at a dangerous potential. Always verify absence of voltage and bond to ground before treating it as dead.
What tester and PPE do I actually need?
A voltage tester rated for the system voltage class, proven on a known live source before and after the test (the NFPA 70E sequence), plus voltage-rated insulating gloves and dielectric boots and an insulating mat to stand on.
Can this be done in the rain or on a damp day?
No. Moisture collapses the dielectric rating of your tools and mat, and a wet surface can put you directly in the circuit. Reschedule for dry conditions.
How does this differ from standard U.S. lockout/tagout?
Same goal, lighter toolkit. U.S. work is governed by OSHA LOTO and NFPA 70E: de-energize, lock out, test for zero voltage, then apply temporary protective grounding. The sparking-stick step here is an informal equalization technique layered on top — it does not replace the verified zero-voltage test.